Long-Term Maintenance Strategy
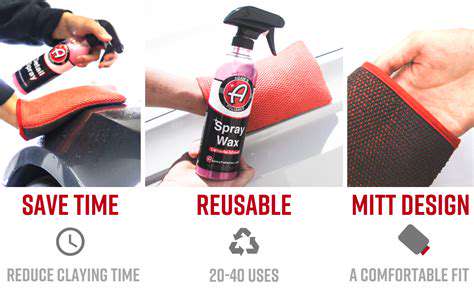
After each use, thoroughly cleanse your mitt with warm water and mild detergent. Allow it to air dry completely before storage in a breathable container. Proper care can extend a quality mitt's lifespan through dozens of applications. Regular inspection for embedded debris ensures continued performance.
The Transformative Benefits
Beyond immediate visual improvement, regular clay treatment protects your investment. By removing corrosive particles, you prevent premature clear coat failure and oxidation. This simple process significantly enhances the durability and longevity of all subsequent protective treatments. The difference in paint smoothness becomes immediately apparent to both touch and sight.
Selecting the Perfect Clay Mitt for Your Vehicle
Material Matters
Today's market offers multiple material options, each suited to specific applications. Microfiber variants excel at general decontamination, while synthetic rubber compounds tackle tougher bonded contaminants. The ideal choice depends on your vehicle's specific needs and paint condition.
For daily drivers, a balanced medium-grade mitt typically provides the best results. Show cars with delicate finishes might require ultra-fine options, while work vehicles benefit from more aggressive formulations. Always consider your paint's age and condition when selecting.
Ergonomic Considerations
The physical dimensions of your mitt significantly impact usability. Compact models offer precision for tight areas, while larger versions speed up broad surface work. A contoured design with finger slots dramatically improves control and reduces hand fatigue.
Consider your vehicle's proportions when choosing size. Sports cars with complex body lines benefit from smaller, more maneuverable options. Large SUVs and trucks warrant bigger mitts for efficient coverage.
Durability Factors
High-quality mitts maintain their effectiveness through multiple uses when properly maintained. Look for reinforced stitching and tear-resistant materials. A well-constructed mitt should retain its shape and texture after repeated cleaning cycles.
Easy-cleaning designs with quick-drying properties save time between uses. Some premium models feature antimicrobial treatments to prevent odor development during storage.
System Integration
Your clay mitt should complement your entire detailing regimen. Consider how it pairs with your preferred lubricants and subsequent polishing steps. A cohesive system approach yields superior results compared to mixing incompatible products.
If you use specific brand systems for other steps, their clay mitt counterpart often provides optimized performance. This ensures chemical compatibility and consistent results across your entire process.
When assessing your automotive needs, consider how frequently you'll perform paint decontamination. Regular commuters in urban environments benefit from quarterly treatments, while garage-kept vehicles may require less frequent attention. Your maintenance schedule should reflect your vehicle's exposure to environmental contaminants.
Vehicle Preparation for Optimal Clay Mitt Performance
Initial Cleaning Protocol
Proper preparation begins with comprehensive washing. Use a high-quality pH-balanced shampoo and multiple buckets to prevent dirt redistribution. This initial cleaning removes loose contaminants that could interfere with the clay's effectiveness.
Pay special attention to lower body panels and wheel arches where road grime accumulates. Use dedicated wheel cleaning tools to prevent brake dust contamination of your paint surfaces.
Surface Inspection
After washing, carefully examine your paint under good lighting. Look for any existing scratches or swirls that might require special attention. This assessment helps determine the appropriate aggressiveness of your clay treatment.
Use the plastic bag test: place your hand in a thin plastic bag and gently glide it over the paint. This magnifies surface imperfections you might otherwise miss.
Environmental Considerations
Choose your working environment carefully. Indoor spaces with controlled temperature and lighting are ideal. Direct sunlight causes lubricants to evaporate too quickly, increasing the risk of surface damage.
If working outdoors is unavoidable, time your session for early morning or late afternoon when temperatures are milder. Have shade solutions available if needed.
Tool Preparation
Organize all necessary tools within easy reach before beginning. This includes multiple microfiber towels for drying and lubricant application. Having a dedicated dirty and clean towel system prevents cross-contamination.
Prepare your lubricant in an easy-to-use spray bottle with fine mist settings. Consider having a secondary bottle with plain water for quick rinses.
Sectional Approach
Mentally divide your vehicle into logical sections for systematic treatment. Typically start with the roof and work downward. This prevents contaminant runoff from affecting cleaned areas.
Mark completed sections with small pieces of painter's tape if working over multiple sessions. This ensures complete coverage without accidental overlaps or missed spots.
Final Checks
Before starting the clay process, ensure your mitt is properly broken in if required. Some benefit from brief soaking in lubricant solution before first use. Proper preparation of your tools is just as important as preparing the vehicle itself.
Do a final check of your working area for any potential hazards that could damage your vehicle during the process.