Choosing the Right Paint
Picking the perfect car paint can make or break your repair project. Finding an exact match for your vehicle's paint code is absolutely critical - even a slight variation can create a visible mismatch that ruins the entire job. The wrong paint choice might also lead to premature fading or peeling, forcing you to redo the work sooner than expected. Always double-check your car's manual or ask a professional if you're uncertain about the correct code.
Different paint types serve different purposes. For small blemishes, acrylic lacquer works well, while urethane formulations offer superior durability for more extensive repairs. Understanding these differences helps you select the optimal product for your specific needs, ensuring a finish that lasts.
Preparing the Damaged Area
Proper surface preparation is the foundation of any quality paint repair. Cleaning the area thoroughly removes contaminants that could prevent proper paint adhesion, which is essential for achieving professional results. Use a specialized automotive cleaner to eliminate grease, wax, and road grime completely.
Sanding comes next - this crucial step creates the ideal surface texture for paint bonding. Work through progressively finer grits to eliminate imperfections while preserving the surrounding finish. Proper technique prevents creating new damage while preparing the perfect canvas for your touch-up.
Essential Tools for the Job
Equipping yourself with the right tools makes the entire process smoother. You'll need:- Precision paint mixing equipment- A quality spray gun (or airbrush for minor work)- Various sanding blocks and multiple grit papersInvesting in professional-grade tools pays off in superior results and easier application. Don't skimp on these essentials if you want a factory-quality finish.
Your workspace matters just as much as your tools. Choose a well-ventilated, brightly lit area and always wear protective gear like respirators and gloves. These precautions protect your health while ensuring optimal working conditions.
Repairing the Damage
Applying paint requires patience and precision. Whether using a spray gun or airbrush, maintain consistent motion and distance to avoid uneven coverage or drips. Follow the manufacturer's instructions carefully for best results - each product has specific requirements for application and drying times.
Allow each coat to dry completely before adding another. Rushing this process can compromise the finish. Multiple thin coats typically produce better results than one heavy application, creating depth and durability in the repaired area.
Finishing Touches and Inspection
The final inspection separates good repairs from great ones. Examine the area under different lighting conditions to spot any imperfections. A quality clear coat enhances both appearance and protection, so don't skip this important final step.
Take your time with the inspection - catching and fixing minor flaws now prevents bigger problems later. The extra attention ensures your repair blends seamlessly and withstands the test of time.
Preparing the Surface: Cleaning and Masking
Surface Preparation: Initial Steps
Proper surface prep is the unsung hero of any painting project. Thorough preparation creates the foundation for durable, attractive results that last. This isn't just about cleanliness - it's about creating optimal conditions for paint bonding.
Removing all contaminants is non-negotiable for proper adhesion. Skipping this step often leads to premature failure, requiring costly rework.
Dusting and Debris Removal
Begin with comprehensive debris removal using brushes, brooms, or vacuums. Even tiny particles can create visible imperfections or weak points in the finished surface.
Incomplete cleaning is a common cause of coating failures. Spending extra time here prevents problems that become obvious only after the paint dries.
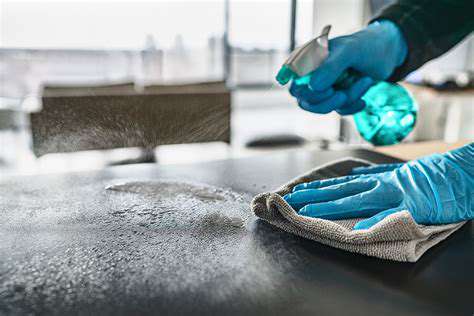
Washing and Detergent Use
Specialized cleaners remove stubborn contaminants like oils and road film. Always use products formulated for automotive surfaces to avoid damage, and follow dilution instructions precisely.
Inspection for Defects
Carefully examine the surface for any flaws that need addressing. Small cracks or chips might seem insignificant but can undermine your entire repair if left untreated.
Finding and fixing these issues now prevents bigger headaches later. Quality repairs start with this careful evaluation.
Drying the Surface Thoroughly
Never apply paint to a damp surface. Moisture trapped beneath the coating will eventually cause bubbling or peeling. Allow ample drying time based on environmental conditions.
Priming the Surface (Where Necessary)
A quality primer improves adhesion and creates a uniform base. It fills microscopic imperfections that could otherwise telegraph through the finish.
The right primer transforms a good repair into a great one. This step is particularly important for bare metal or heavily repaired areas.
Final Inspection and Preparation
Conduct one last thorough check before painting. Verify the surface is clean, dry, and flawless. This final quality control step ensures all your preparation pays off.
Meticulous final inspection is the hallmark of professional work. It's your last chance to catch and correct any issues before applying paint.